If you are changing the floors in your home, you have your wood cut out for you. It’s not just a question of taking out the old floors or peeling them off. You also must make sure that it’s even.
 A lot of the products that you get at a typical hardware store make your job is easier through consistent surface quality. In other words, the typical hardwood floor products that you get at your do-it-yourself home building construction supply store are uniform.
This much is true, but here’s the problem. Underneath the surface of your floor, there may be some irregularities. This is what you should be on the lookout for. A lot of homeowners think that if it looks level enough their problems go away.
They think that they just need to get the right hardwood tiles to slap them on their floors and they’re good to go. If only were that easy. The truth is you’re going to have to deal with the irregularity or uneven surface of the concrete underneath.
You may be thinking since this is underneath, nobody can really see it. So, if I lay on a hardwood floor tile on it, nobody’s the wiser. Think again.
If it is slightly elevated, it’s going to cause a minor bump on your hardwood floor. In fact, these bumps are so minute that they might even be noticeable to the naked eye.
If you’re not trained or if you are not looking for this kind of thing, you’re not going to see it. But guess what, when you have guests over and you use the floor over an extended period, dirt, debris, scratches, and all sorts of nasty blemishes will appear.
The worst part of all of this is that people who are clueless regarding this situation think that it’s just the way that the hardwood floor tiles were made or it’s a defect of some sort. That’s not what’s going on.
 What’s going on is that there’s nothing wrong with the hardwood floor tiles. It’s just being pushed up by the irregular surface that starts at the concrete floor where the tiles are laid on top of.
Do you see the problem? This is a serious issue. This is where your drum sander comes in.
If you’re sure that there won’t be any shifts or sinking in the surface of the concrete underneath your flooring, you can sand down this minute height difference. So, your hardwood floor would have a nice, smooth, and consistent look to it.
Prepare your hardwood floor the right way
The first thing you need to be aware of is to pinpoint where these irregular surfaces are. The good news? You don’t have to eyeball it. Seriously, it’s very tempting to just focus on the most obvious indentations or raised areas.
That would be a mistake because if you were to do that you would overlook most of your floor area that shares this problem. Just because you’re not aware of it or it’s apparent to you doesn’t necessarily mean it doesn’t exist. So, the best approach here is to use a laser level.
You can find these at your local hardware store. You can find them online. When you use a laser level, it takes a flat plane. It uses lasers to measure the flatness or consistency and evenness of that flat plane. It uses raw math to do this. There’s no guesswork involved.
 The best part? It’s so precise that you don’t have to second guess yourself. You don’t have to eyeball anything. Once you have this reading, you can then clearly identify where the uneven spots are. You can make the necessary markings and then you can get to work with your drum sander.
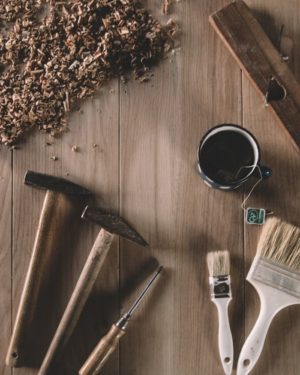
It’s very important to prepare many different grades of sandpaper as you make progress. At first, you want the rougher or coarser paper, but when it comes time to polishing, you need the finer and finer grade.
Very important advice: Please read this
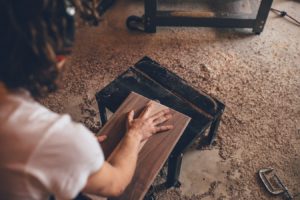
When you’re using a drum sander on hardwood floors the first time, you need to ‘train’ yourself on how to apply just the right pressure as you bear down on the hardwood tiles trying to even them out. This is going to be an expensive mistake if you are just starting out. Don’t do it!
Do this instead: buy a set of extra tiles and practice on these. Figure out just the right amount of elbow grease to apply. Don’t lean too hard onto the drum sander. Just ease into it and pay close attention to its effect on the tile. You may have to experiment with different levels of pressure as well as different angles. What’s important is you get the right amount of pressure sooner rather than later. Also, it’s important that you’re testing out the sander on extra or ‘trainer’ hardwood instead of your actual floor. A little bit of preparation can go a long way in helping you save time and money later on.
Please do the prep work above. It might seem like an extra step. Some might even find it a hassle but it is absolutely necessary if you don’t want to ruin your tiles.
By the end of the process and all the dust has settled, you have a nice even good-looking hardwood floor. If you do this right, you will end up increasing the value of your property.